
- Support
- How to Set Up a VPN on Mac
- User guide for personalVPN™ Mac App
using witopia’s mac vpn software
We’d like to think we made the software so intuitive that you needn’t read any further. So, launch it, click on the WiTopia icon in your upper toolbar, and jump right in.
Or, by all means, peruse the guide below beforehand.
Welcome Screen

Low Profile Mode
While enabled, there will be no software updates or location detection by the client so the Quick Connect feature will not work and you’ll have to choose your VPN Gateway manually.
Toolbar Icon Controls
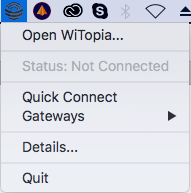
Open WiTopia – Launches main WiTopia software client.
Quick Connect – Automagically connects you to the VPN Gateway closest to your present location. Will not work if you enabled low profile mode.
Gateways – Choose your VPN Gateway manually.
Details – A bit of eye candy.
Quit – Will quit the application and you’ll need to relaunch it to restore icon. Instead, you may want to choose Disconnect when you finish using the VPN.
Desktop Client Controls
Connect Screen
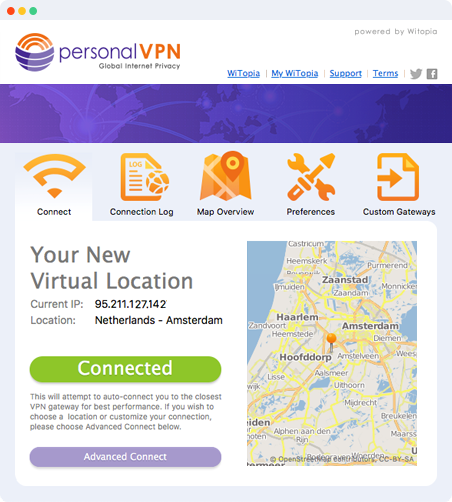
Unless low profile mode is enabled, the client detects your current location and IP address and will use that data to “automagically” connect you to the closest VPN Gateway. All things being equal, this will offer you the best performance.
Once connected, the client will show your new virtual IP address and location that the rest of the world will see. Your real IP address and location is now completely cloaked.
Advanced Connect Screen
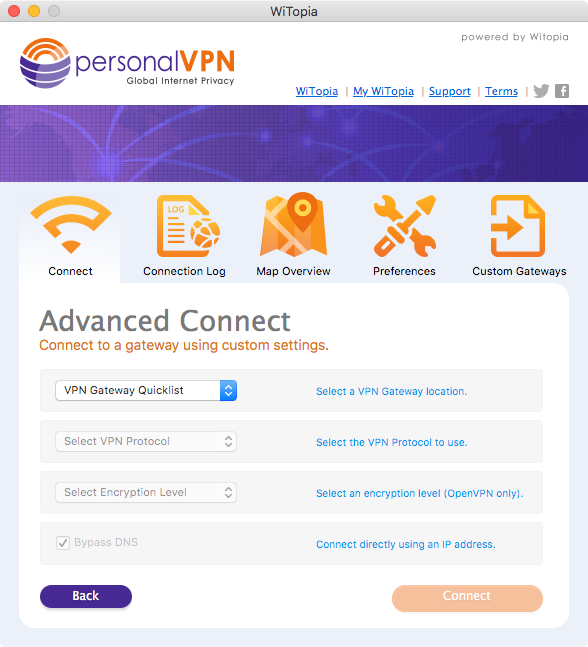
VPN Gateway Quicklist – Choose your desired VPN Gateway. Usually, choosing the closest to your current location is best for speed, but you have unlimited access to all gateways worldwide and may switch at will.
Select VPN Protocol – Choose your desired VPN type. Sometimes you will find that a particular VPN protocol will be blocked, or perform better or worse, at a location. To solve this, we give you several from which to choose. For general purposes, it won’t matter which one you select as long as it connects.
OpenVPN (personalVPN Pro™ only) – The Swiss Army knife of VPNs. Extremely secure and high-performing. For virtually limitless configuration options, check the “Custom Gateways” tab of the software. This flexibility, among other things, makes openVPN virtually un-blockable.
L2TP – Secure, well-performing, and gets around most blocks.
IPsec – Lightning quick to connect and very speedy. Extremely secure as we support up to AES 256bit encryption. Very capable in circumventing blocks.
PPTP – Older VPN protocol originally developed by Microsoft. Slower and less secure than other VPN types but often works better over congested networks as it utilizes TCP which has built-in error correction.
Select Encryption Level – The maximum encryption level available will usually be automatically chosen for you. At certain Gateways, you may be given an option to choose 256-bit encryption. This may slow performance down, but we make it available for those that desire it.
Bypass DNS
This should normally remain unchecked, but is VERY useful at locations that may block access to VPN network using DNS such as China, etc.. When checked, you will connect using a server's IP address, not a server "name".
Connection Log
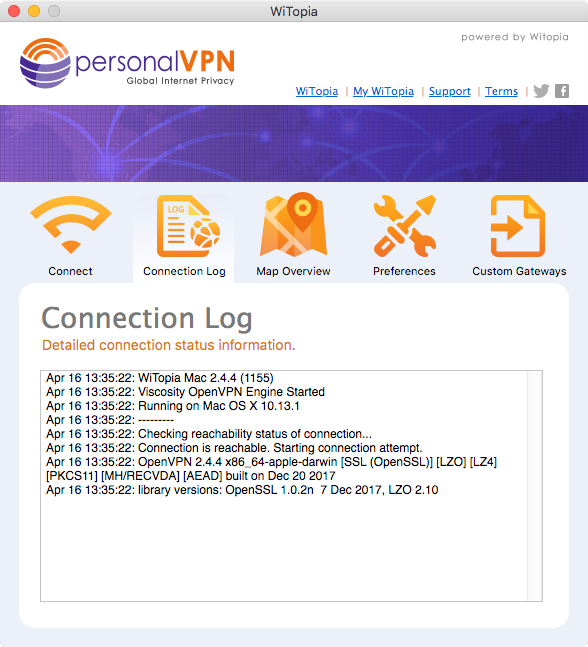
Self-explanatory, but if you have a connection issue, copy and paste this into your email or chat and it may help Support diagnose and resolve it.
Map Overview
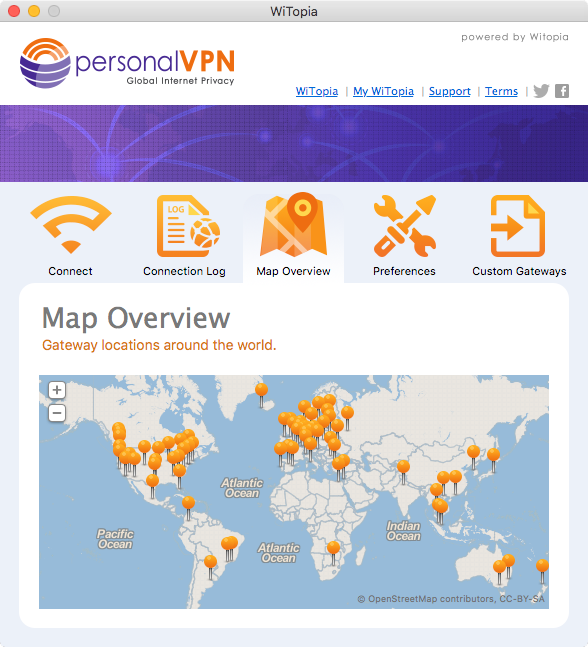
For now, just a general map showing VPN Gateway locations around the world. More functionality is being considered for future versions.
Preferences
General
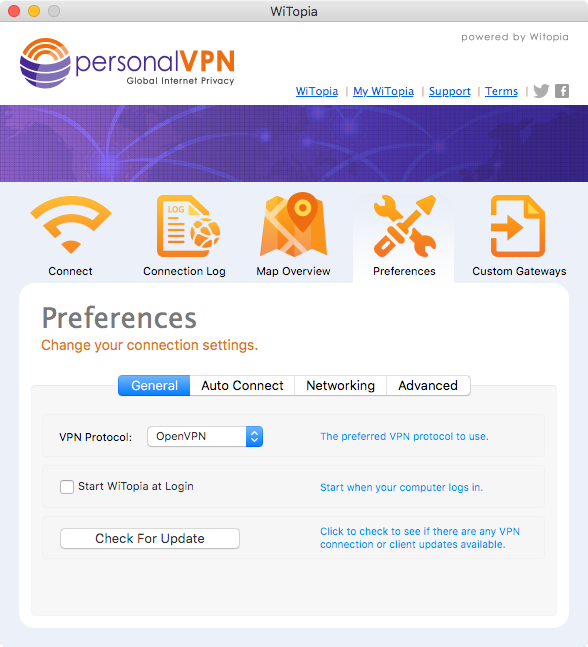
VPN Protocol – Selects your default VPN protocol. See above for basics of the VPN types we offer or, for more detailed information, click here.
Start WiTopia at Login – Launches WiTopia software at startup or login but awaits your connection instructions.
Connect to gateway at start – Auto-connects you to your gateway of choice.
Networking
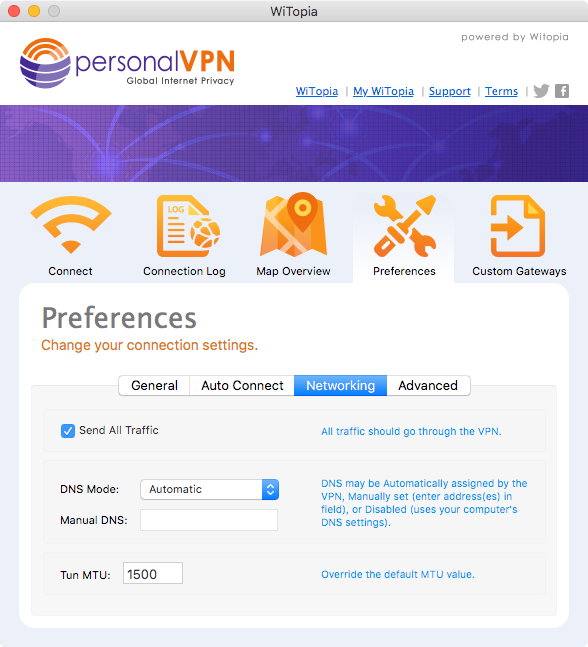
Send All Traffic – By default, the VPN will send all your Internet data through the secure VPN tunnel. In future updates, we may allow you to choose certain services or websites to not be protected by the VPN if you prefer.
DNS Mode
The Domain Name System (DNS) is the Internet protocol that converts website names, that humans easily understand (such as google.com), into IP addresses that computers easily understand (such as 74.125.113.104).
The DNS server your device uses to perform this conversion can be a key component of web browsing performance, therefore, WiTopia allows you to customize your DNS settings while the VPN is connected.
Automatic – The VPN will use WiTopia’s DNS servers.
Manual – This setting allows you to input a VPN server of your choosing that the VPN will use when it is connected.
Disabled – The VPN will use the DNS settings on your computer, usually your Internet Service Provider’s unless you have customized your DNS settings.
TUN MTU – Maximum Transmission Units are the largest chunk of data (in bytes) that is allowed over a transport layer. It’s a parameter for tuning a data network for optimal performance and efficiency. Exciting, right?
Unless you’re having a performance issue you should normally leave this blank, which will use our standard MTU of 1400. For reference, Ethernet and Wi-Fi typically use an MTU of around 1500.
If you are having slow performance, consult our VPN Speed Guide for common issues and, if that doesn’t work, try entering values from 1250-1500, maybe starting low, and increasing in increments of 25 and see if performance improves. Never start with MTU as a way to improve speed though. Eliminate the basics first.
Advanced
Enable Low Profile Mode – For those of you who truly want to be off the grid. Low Profile Mode disables the client’s location detection features as well as updates. We don’t recommend this as it lessens the functionality and experience in our opinion, but we thought we’d provide the option just the same.
Custom Gateways
For the great majority of customers our standard settings will provide optimal performance. Sometimes, however, you may need or desire the flexibility to create a custom setting. This is especially true at locations that filter or censor access to the Internet or have other connectivity issues.
Usually, you will want to do this with the help of our Support staff but if you feel comfortable, feel free to try it out.
Once you save your custom settings, they will appear at the top of your VPN Gateway pull-down menu from your WiTopia toolbar icon or under Advanced Connect.
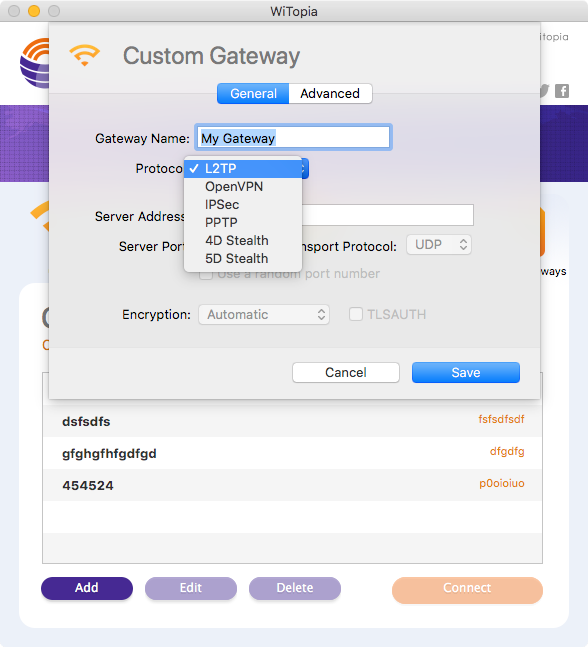
General
Gateway Name – Name your new gateway whatever you wish.
Protocol – Choose the VPN protocol.
Server Address – You can use a VPN gateway name from this list or Support can offer you special settings if necessary.
Server Port – Enter the port you wish your VPN tunnel to use. Support can offer special assistance here if necessary.
Transport Protocol – Choose the Transport Protocol. UDP is usually the best choice.
Encryption – We only offer 256 AES at certain locations so best to check with Support on this one.
TLS AUTH – We only use at certain locations so, again, it’s best to check with Support before checking the box.
Advanced
OpenVPN Commands – Unless you have intimate familiarity with OpenVPN, and probably even if so, you should talk to us before entering any commands in this section.
Have more questions? Let us know how we can help you.