
- Support
- How to Set Up a VPN on Windows
- manual l2tp setup for windows 7
manual l2tp setup for windows 7
Setup L2TP On your Windows Computer
Windows 7 L2TP Setup
a. Click on Windows Start Orb (bottom left corner)
b. Click on Control Panel
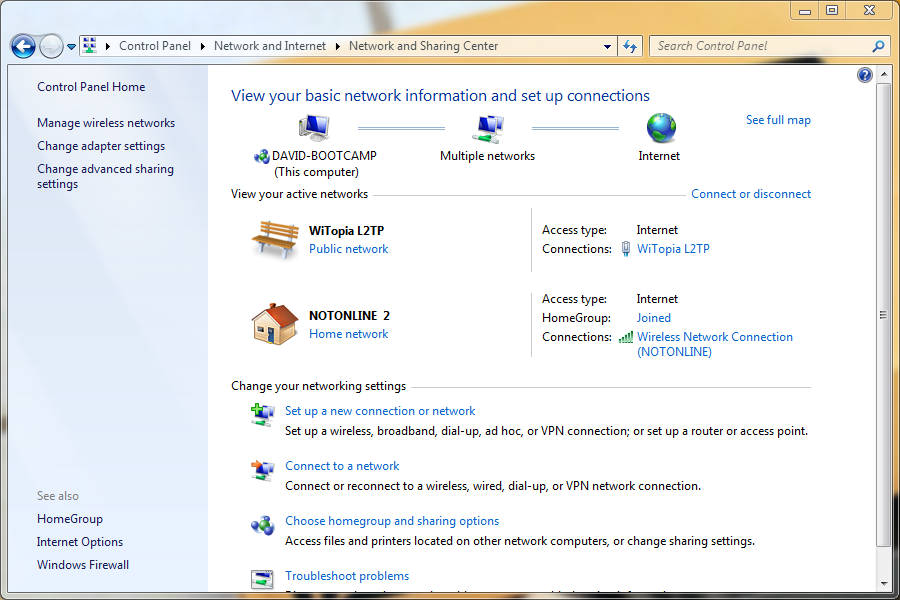
c. Click on Network and Internet
d. Click on Network and Sharing CenterYour screen should look similar to this
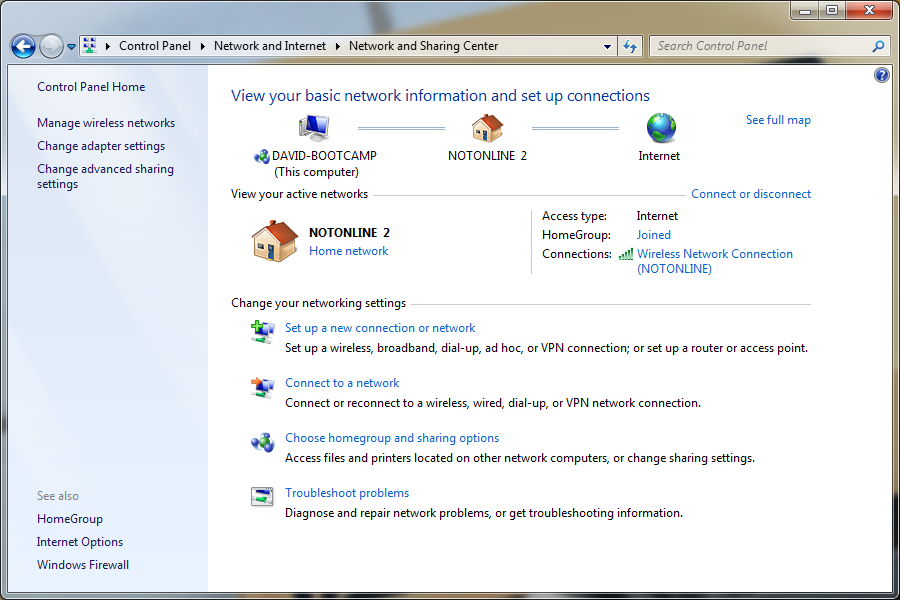
- Click on Setup a new connection or network
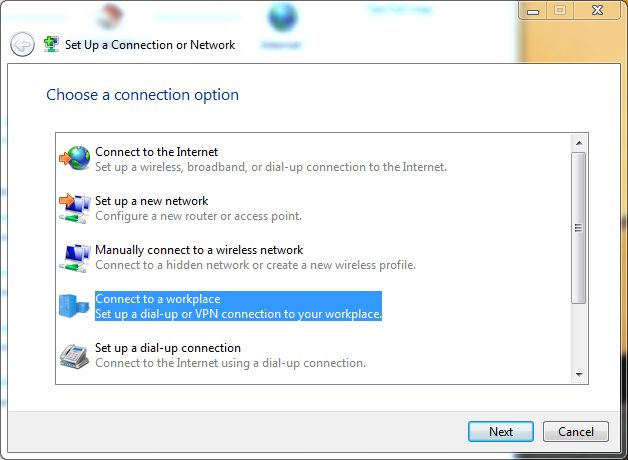
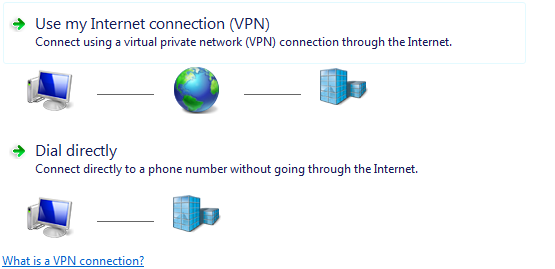
- Choose Use My Internet Connection
- Input your settings:internet Address: CLICK HERE TO CHOOSE A CONNECTION LOCATION Destination Name: WiTopia L2TP VPN (or whatever you want to put here)
L2TP Server Address Locations
North America L2TP VPN Gateway
l2tp.atlanta.witopia.net
l2tp.baltimore.witopia.net
l2tp.boston.witopia.net
l2tp.chicago.witopia.net
l2tp.denver.witopia.net
l2tp.dallas.witopia.net
l2tp.kansascity.witopia.net
l2tp.lasvegas.witopia.net
l2tp.longbeach.witopia.net
l2tp.losangeles.witopia.net
l2tp.miami.witopia.net
l2tp.mexicocity.witopia.net
l2tp.montreal.witopia.net
l2tp.redding.witopia.net
l2tp.newark.witopia.net
l2tp.newyork.witopia.net
l2tp.phoenix.witopia.net
l2tp.portland.witopia.net
l2tp.redding.witopia.net
l2tp.sanfrancisco.witopia.net
l2tp.seattle.witopia.net
l2tp.washingtondc.witopia.net
l2tp.vancouver.witopia.netEurope L2TP VPN Gateways
l2tp.amsterdam.witopia.net
l2tp.barcelona.witopia.net
l2tp.berlin.witopia.net
l2tp.brussels.witopia.net
l2tp.bucharest.witopia.net
l2tp.budapest.witopia.net
l2tp.copenhagen.witopia.net
l2tp.dublin.witopia.net
l2tp.frankfurt.witopia.net
l2tp.helsinki.witopia.net
l2tp.lisbon.witopia.net
l2tp.london.witopia.net
l2tp.madrid.witopia.net
l2tp.milan.witopia.net
l2tp.mumbai.witopia.net
l2tp.newdehli.witopia.net
l2tp.oslo.witopia.net
l2tp.paris.witopia.net
l2tp.riga.witopia.net
l2tp.rome.witopia.net
l2tp.stockholm.witopia.net
l2tp.vienna.witopia.net
l2tp.warsaw.witopia.netAsia/Pacfic L2TP VPN Gateways
l2tp.auckland.witopia.net
l2tp.bangkok.witopia.net
l2tp.melbourne.witopia.net
l2tp.seoul.witopia.net
l2tp.singapore.witopia.net
l2tp.sydney.witopia.net
l2tp.tokyo.witopia.netPowered by HTML5 Responsive FAQ - IMPORTANTClick on the option Don’t connect now; just set it up so I can connect later
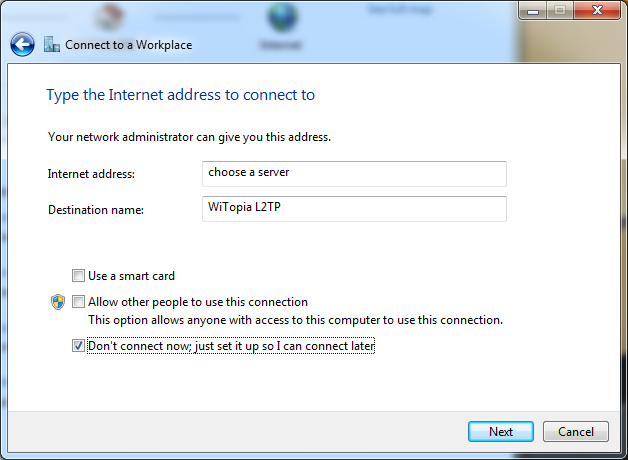
- Click Next
- Input your PPTP Username and Password
There are two formats for usernames and they are NOT interchangeable. Please see the “details” under your active services via the portal to see your correct username.
Format 1: username@witopia (notice that there is no .net at the end)
Format 2: W\your@email.com (the W \ must be present)
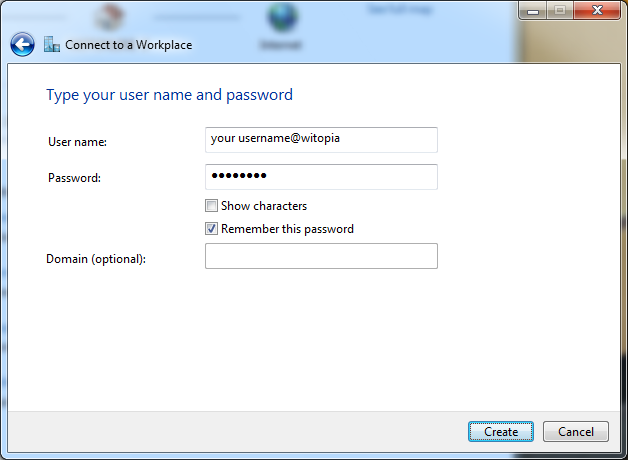
- Click Create
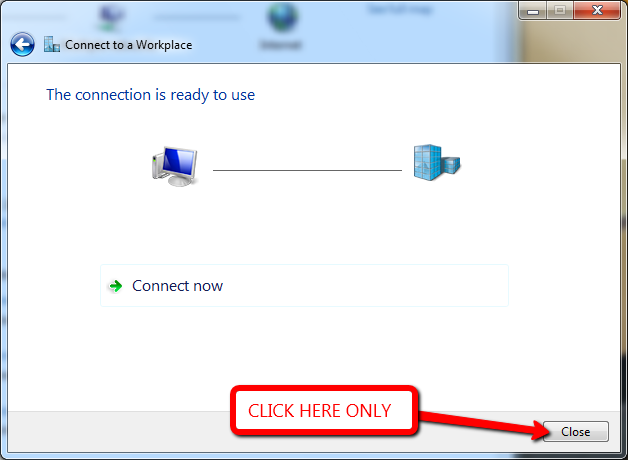
- IMPORTANT Click on CLOSE (do not connect right now or it will fail)
- Click Connect to a network now that you are back at the Network and Sharing Center
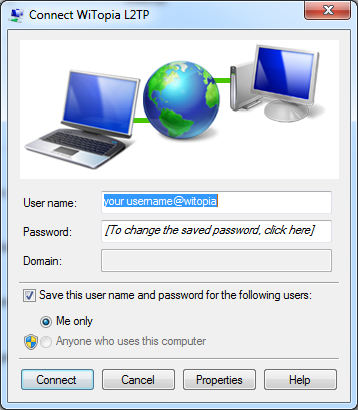
- On the pop-up window double click the WiTopia L2TP name
- Click on Properties
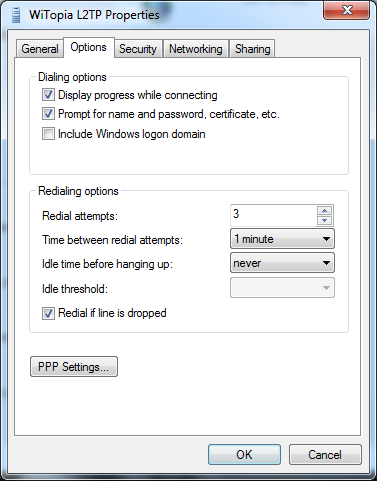
- Click on Options
- Uncheck Include Windows logon domain
- Click on Security
- On Type of VPN Choose L2TP/IPSec
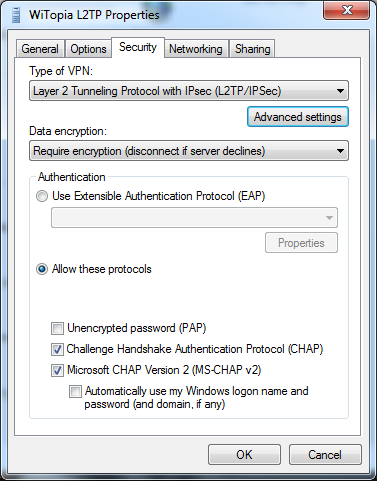
- Click on the Advanced button
- Click on the top option Use preshared key for authentication
- Input witopia1 as the Key
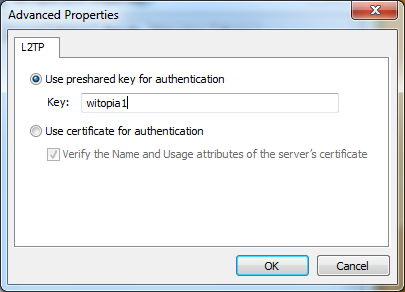
- Click Ok
- Click on Networking
- Uncheck Internet Protocol Version 6
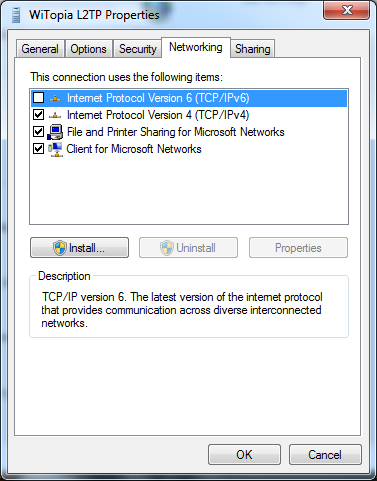
- Click OK
- On the connect screen enter your username and password again
- Click on Connect

You should be connected to the VPN now.
connecting and disconnecting
To connect click on the wired/wireless symbol in the taskbar, and click on the Witopia L2TP connection and click connect.
To disconnect follow the same steps to connect just click on the disconnect option
Have more questions? Let us know how we can help you.